
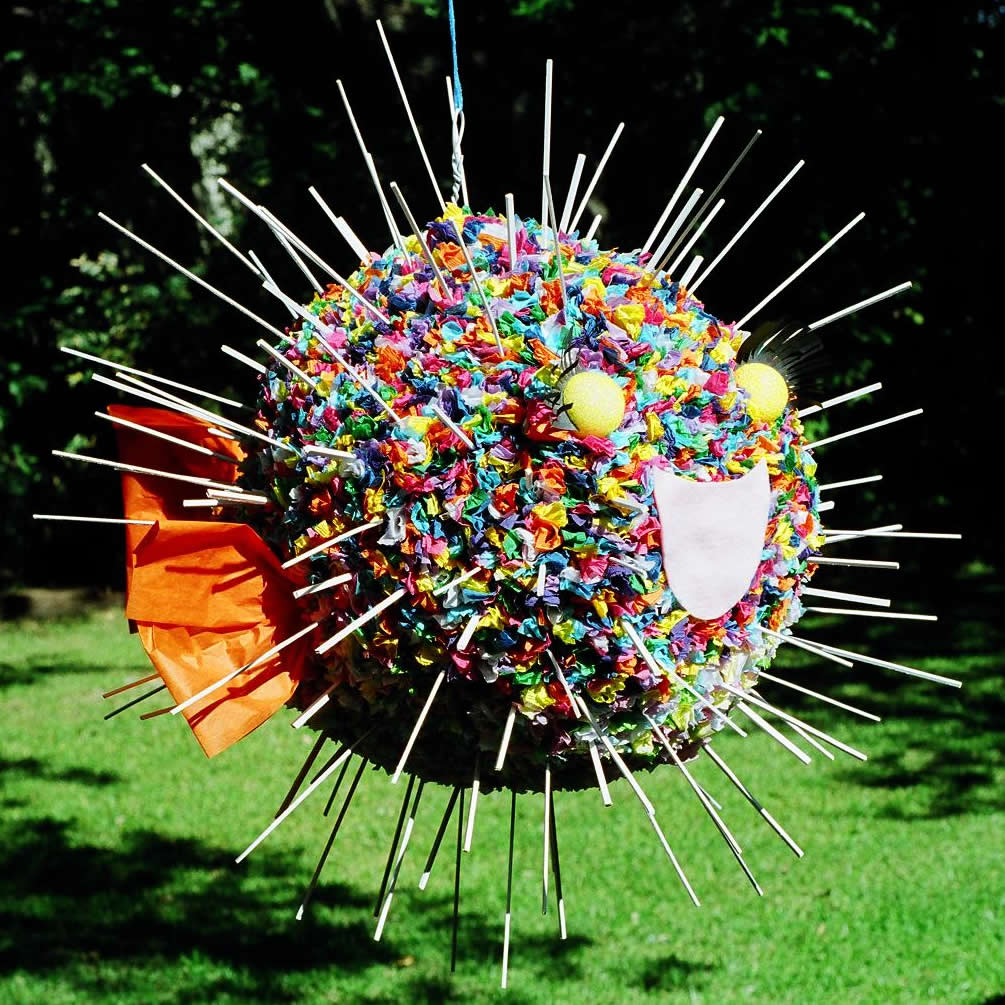
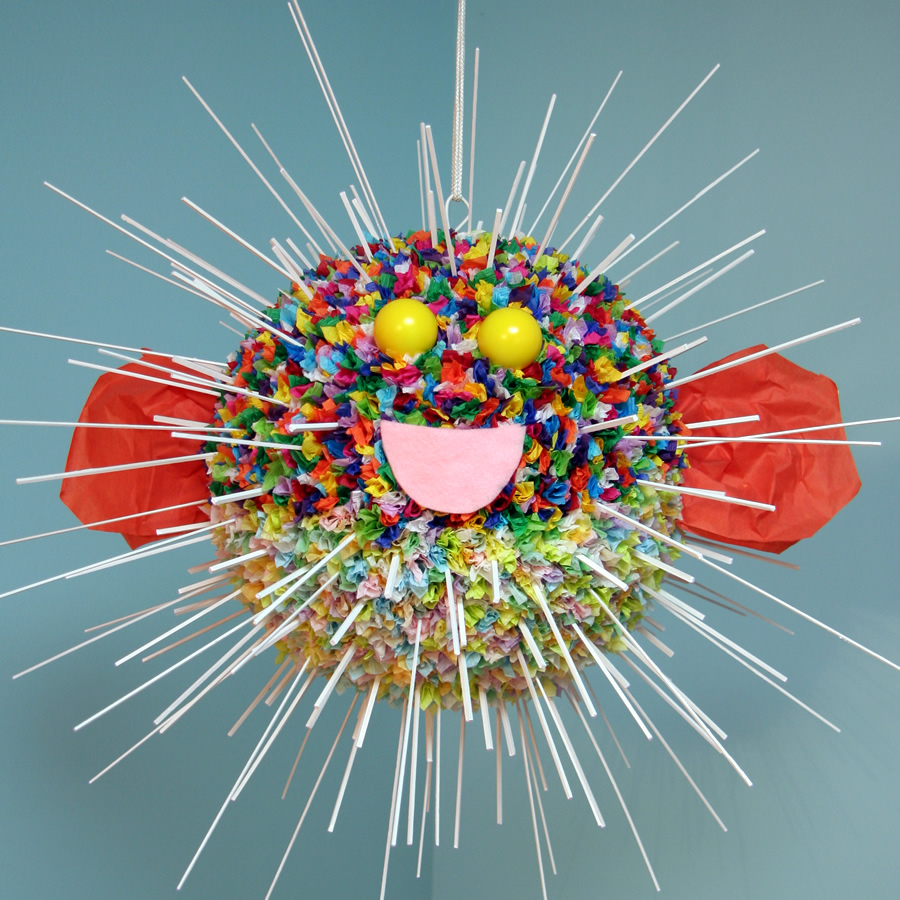
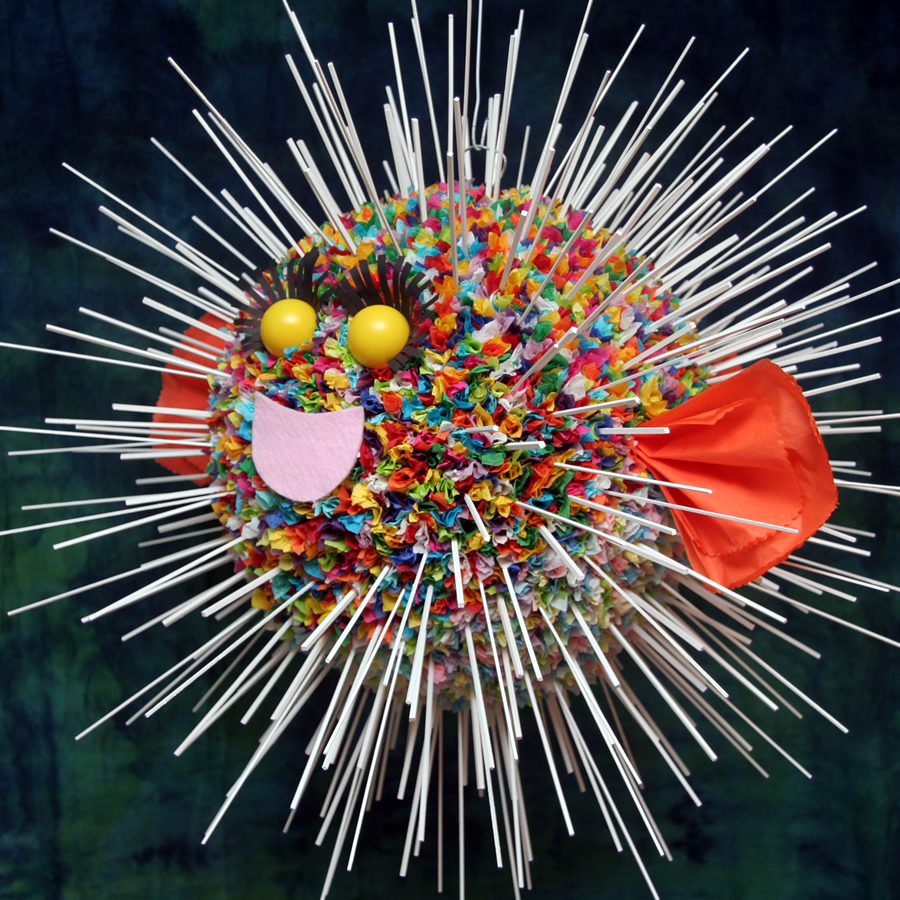
This Porcupine Pufferfish piñata takes so long to build you’d have to be borderline insane to even consider making one. You’d need be completely out of your mind to make two. I’ve made three.
11 inch diameter, 128 spikes
11 inch diameter, 228 spikes
12.5 inch diameter, 387 spikes
When Kerry said she wanted a porcupine pufferfish piñata for her birthday party my first question was how I was going to do the spikes. They have to stick out at all angles from the body without sagging toward the ground.
My first thought was to use nails that were pushed out from the inside of the piñata and glued in place, but even I could tell that wasn’t a very good idea. It would have been the world’s first anti-personnel piñata.
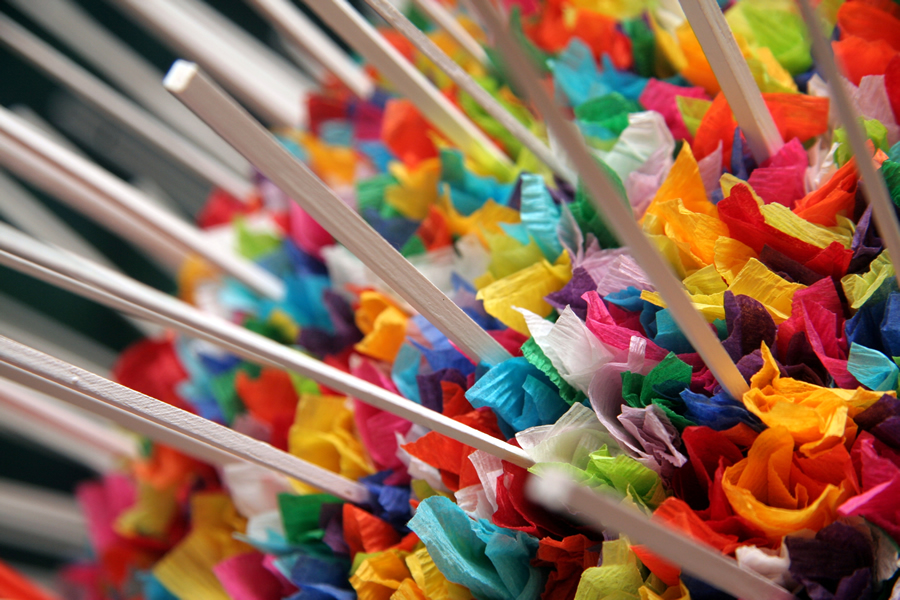
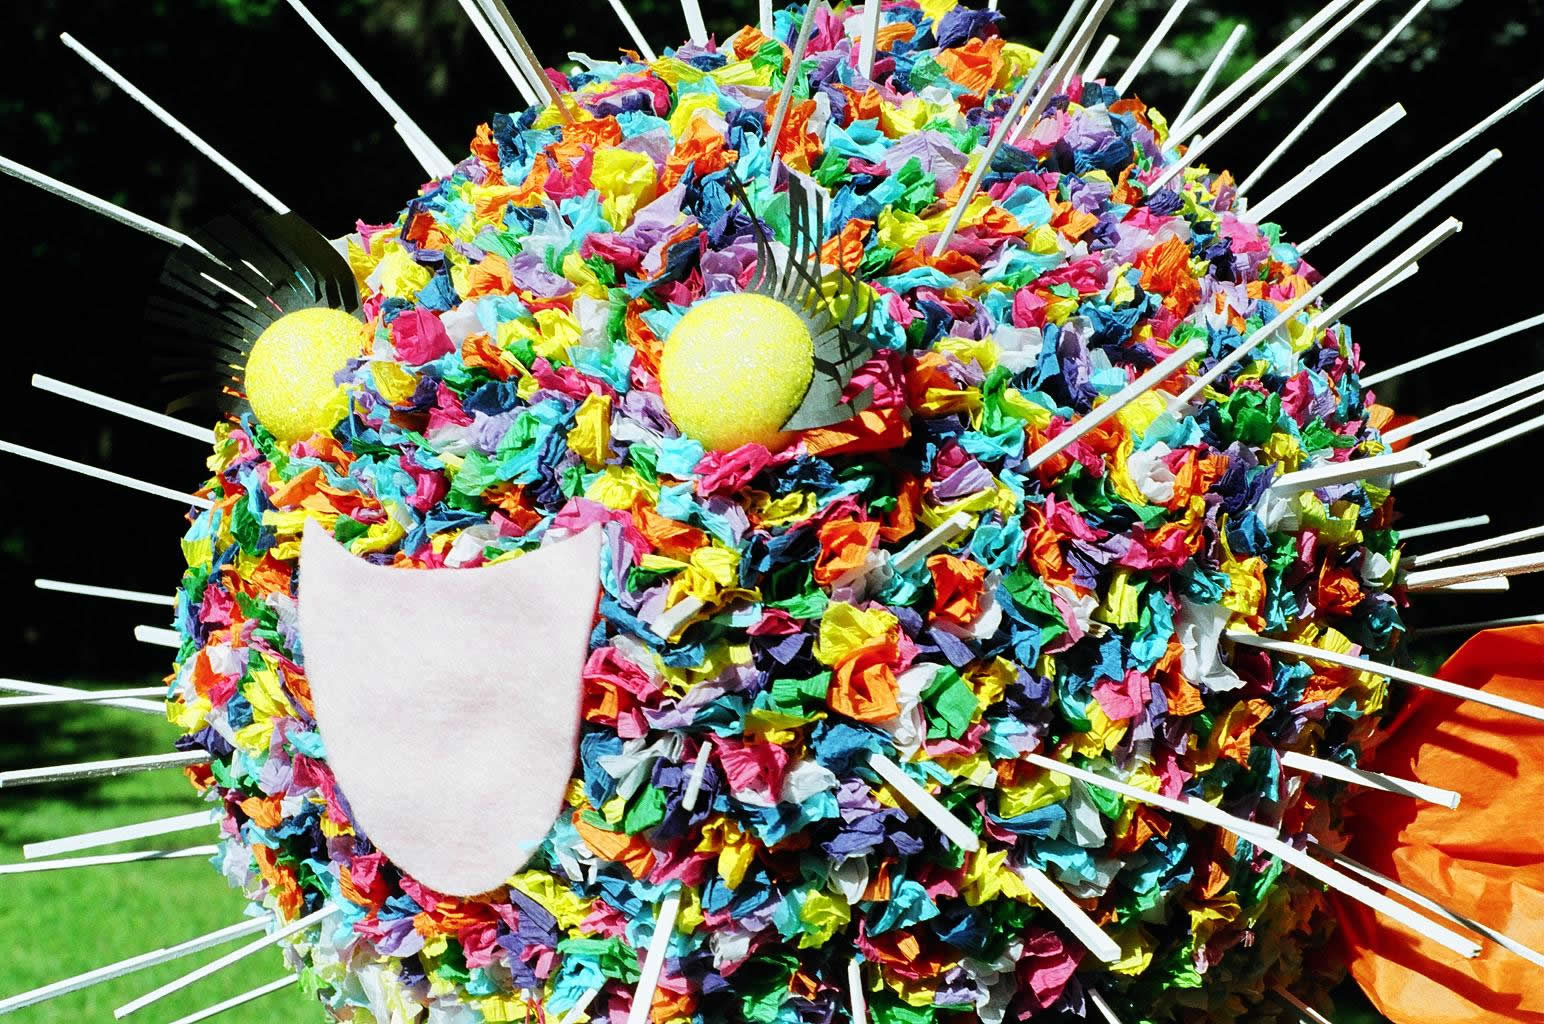
A better idea was to use lightweight balsa wood sticks and prop them up with crepe paper using the floral technique I came up with three years earlier for the Barbie Heart. I covered the entire pufferfish piñata in crepe paper cylinders and then slid the glue-tipped balsa wood spikes in between adjacent cylinders. The crepe paper cylinders were so tightly packed they prevented the spikes from sagging.
Problem solved, except…
A balloon with an 11 inch diameter has a surface area of almost 400 square inches. Each cylinder in the floral technique covers an area the size of a pencil eraser, or about 1/16th of a square inch. That means I needed 6400 squares of crepe paper, each one individually shaped and glued on. It took 14 hours just to do the crepe paper decorating. Painting, cutting, and gluing on the spikes added a few hours more. The third Porcupine Pufferfish piñata had a 12.5 inch diameter and required about 8000 pieces of crepe paper. It took over 22 hours just to glue on the crepe paper. Pound for pound that was easily the most time-consuming piñata I’ve ever made.
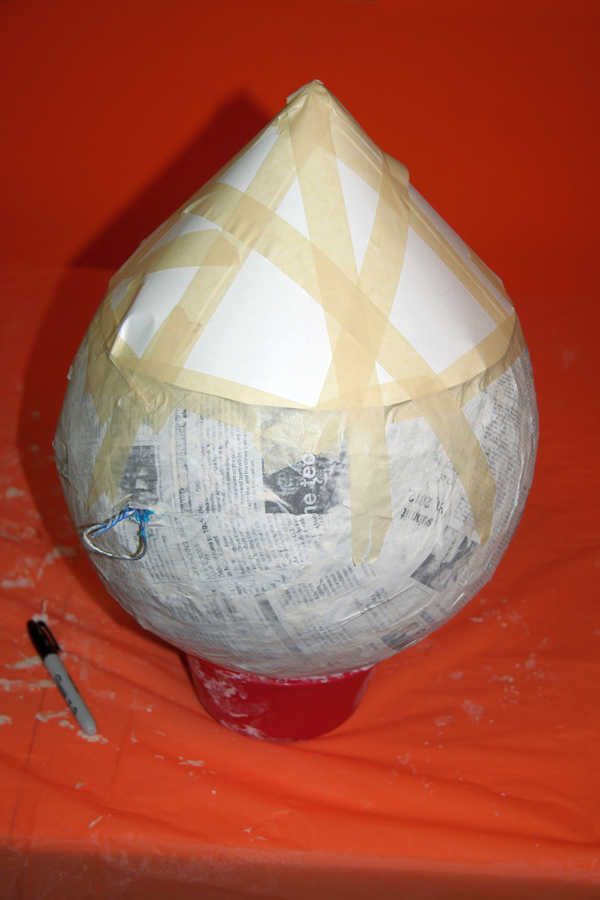
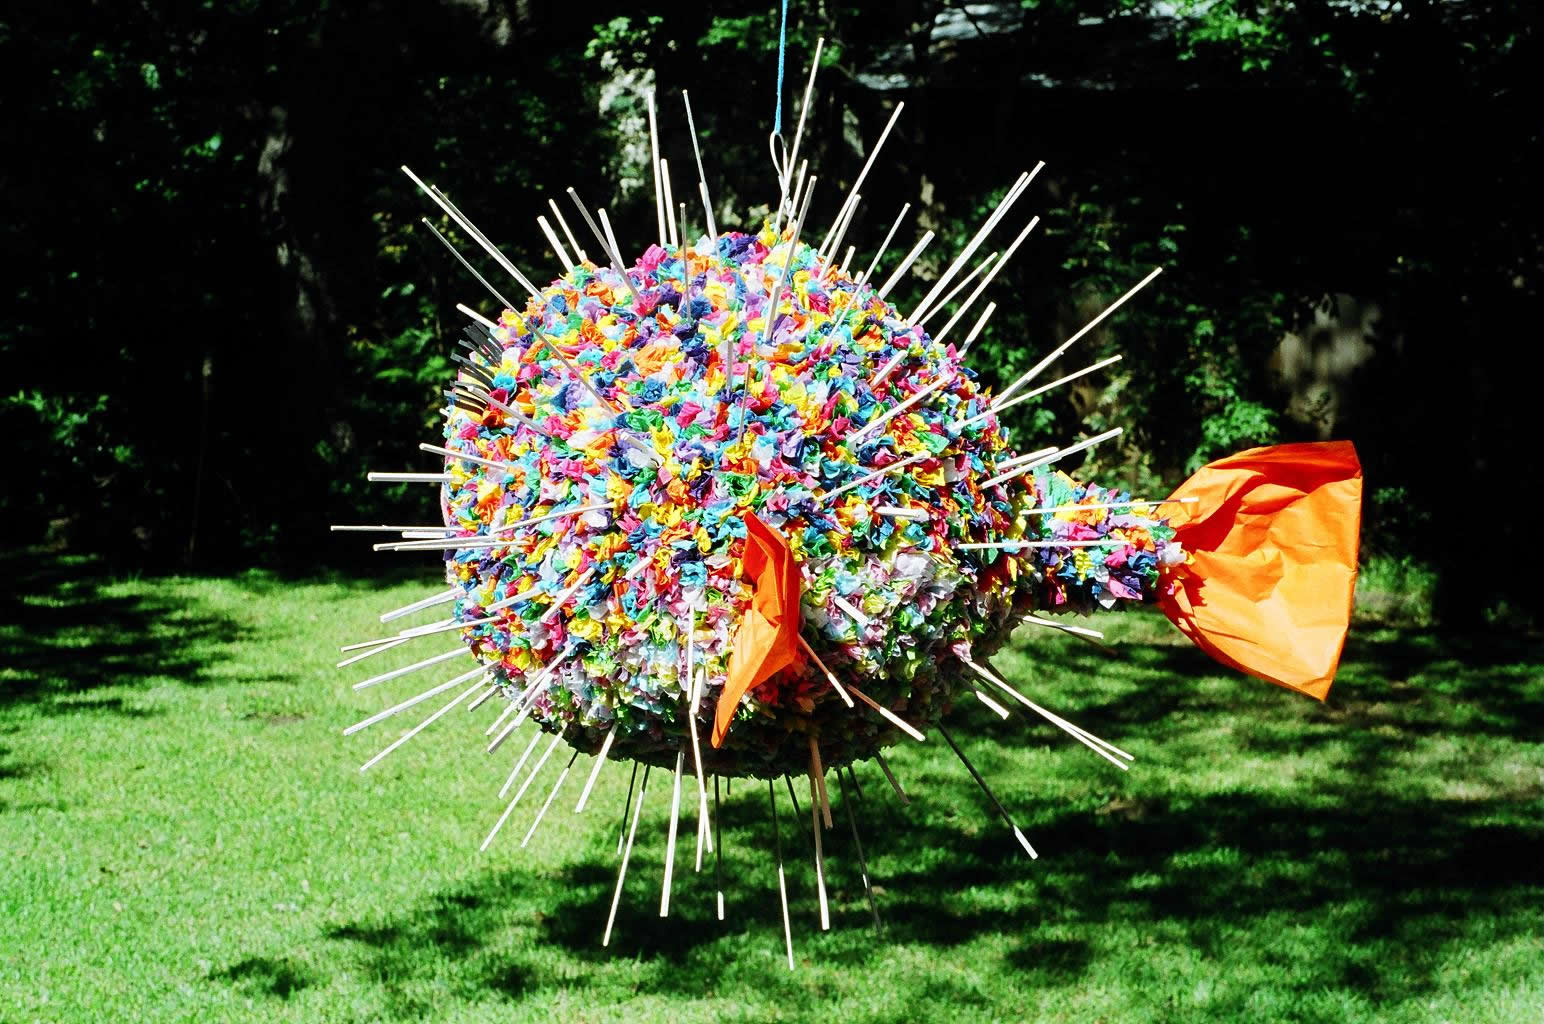
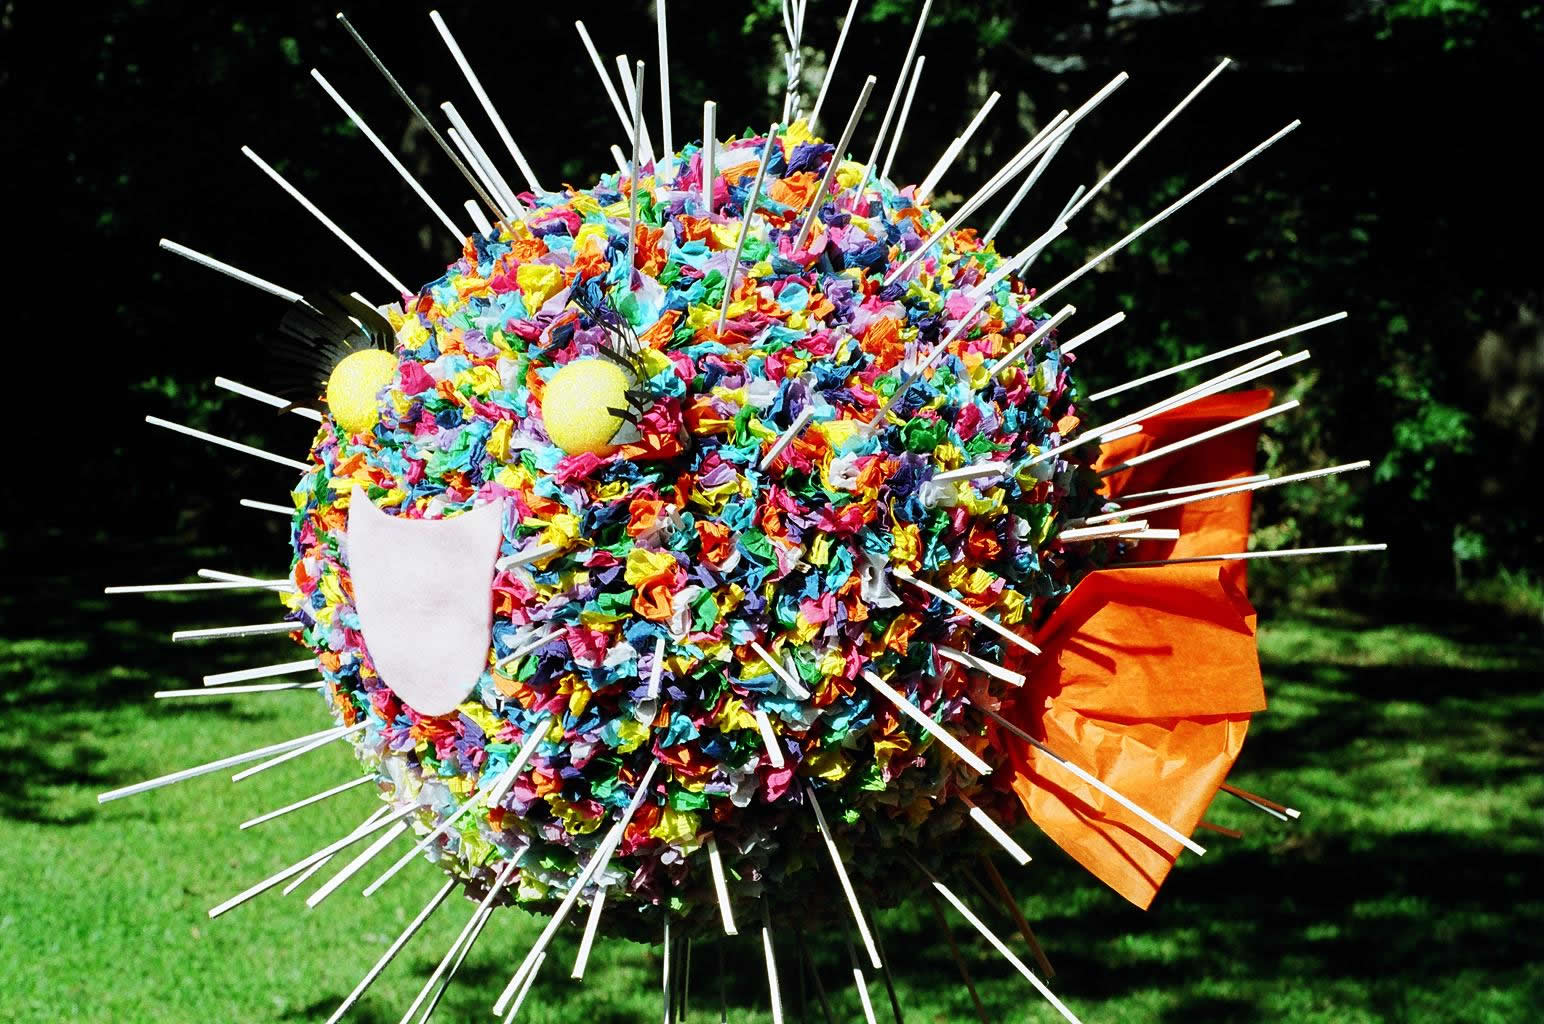
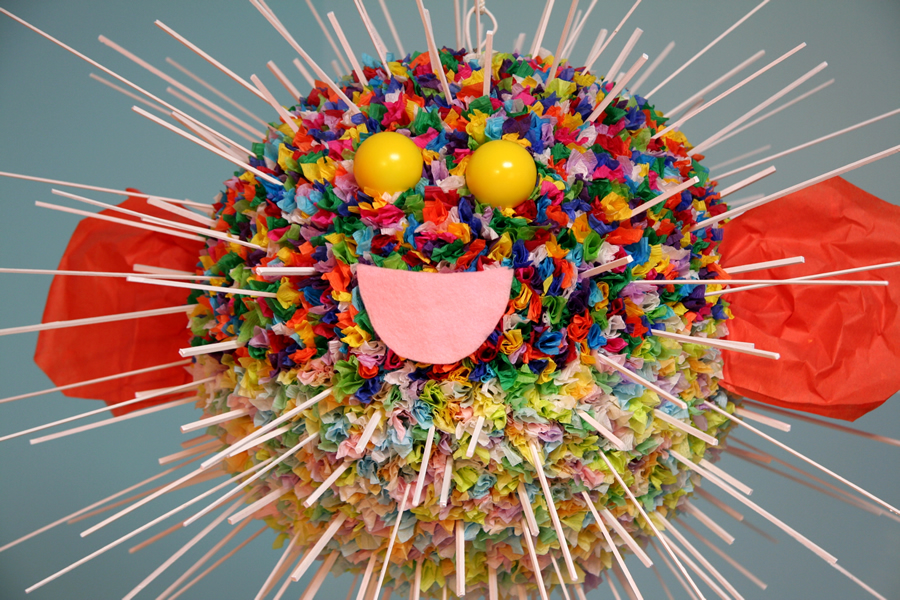
The body is a punch ball. The tail section is a cone made from card stock.
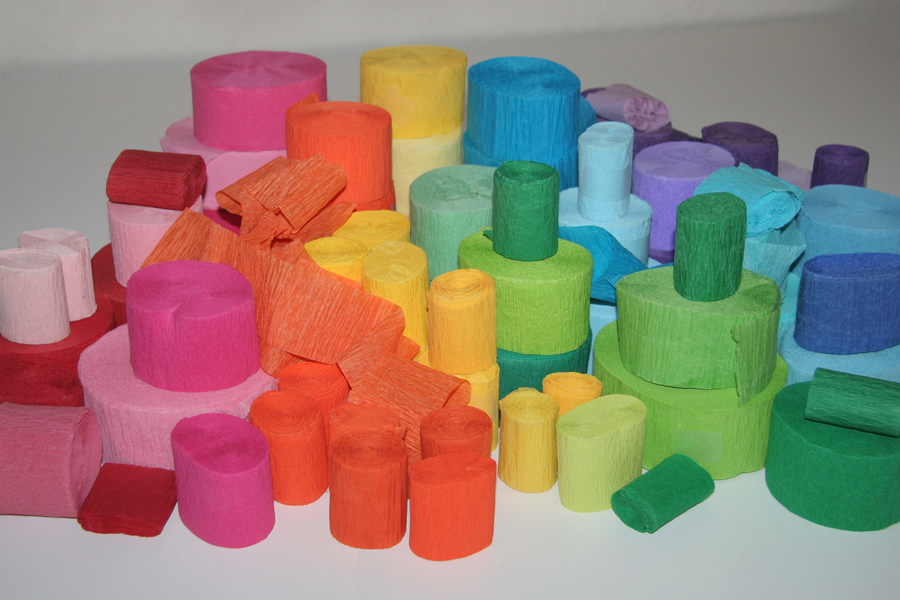
The pufferfish’s camouflage skin had 10 pastel colors on the underbelly and 16 bright colors on top.
Once I started decorating I couldn’t set the pufferfish down or it would crush the crepe paper, so I made a stand to hold it using wood and wire shirt hangers. The stand only crushed a few spots at a time, which I could straighten back up.
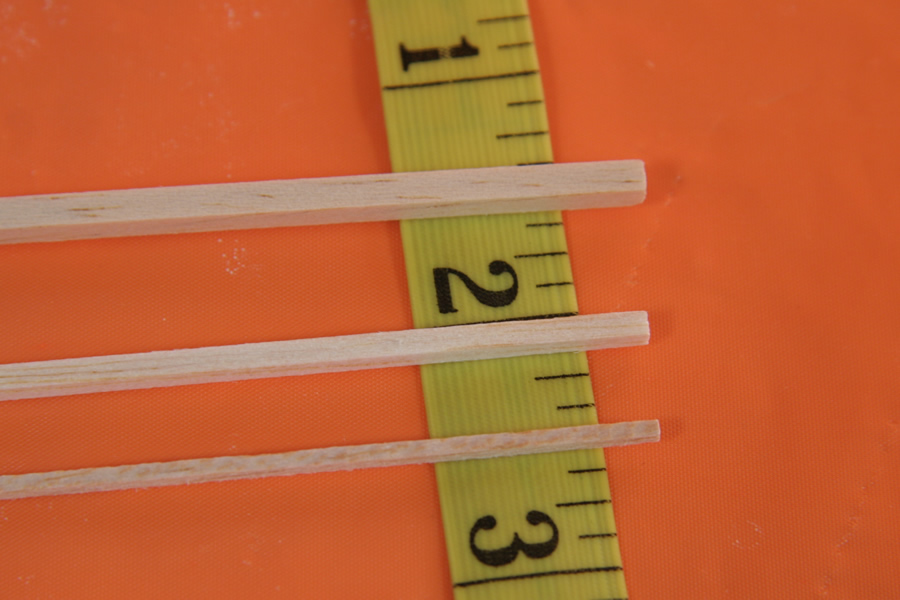
I wanted the spikes to be crazy but not entirely random, so I used three different thicknesses of balsa wood, cut to three different lengths. The thick spikes are the shortest, and the thinnest spikes are the longest.
My first porcupine pufferfish had a more realistic tail than the next two. That was the only realistic thing about it, so I don’t know why I even bothered.
The second pufferfish had 100 more spikes than the first one. I also made the spikes an inch or two longer, but in hindsight I thought they were too long so I went back to the original lengths on the third one.

The third pufferfish piñata was far more work than either of the first two because it had 25% more surface area and three times the number of spikes of the first one.


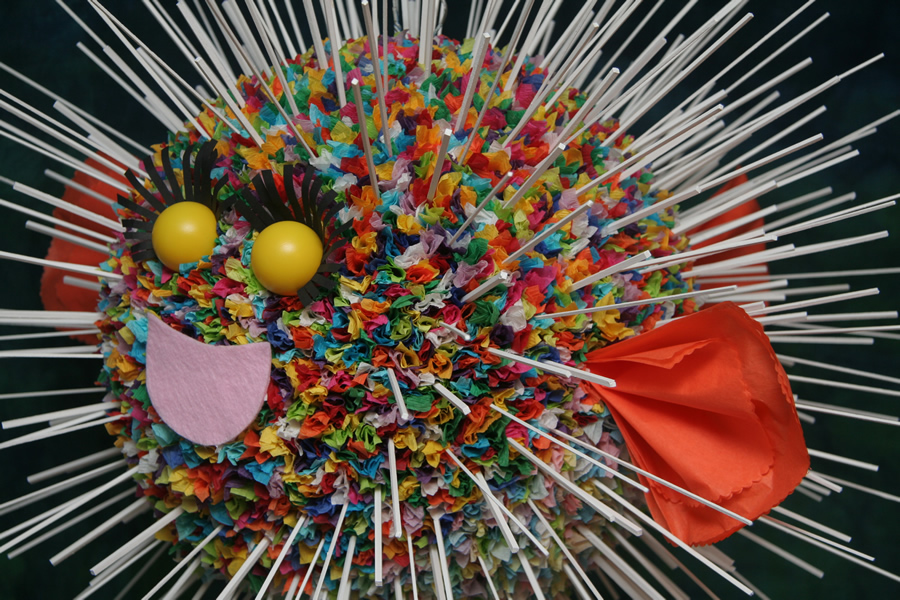
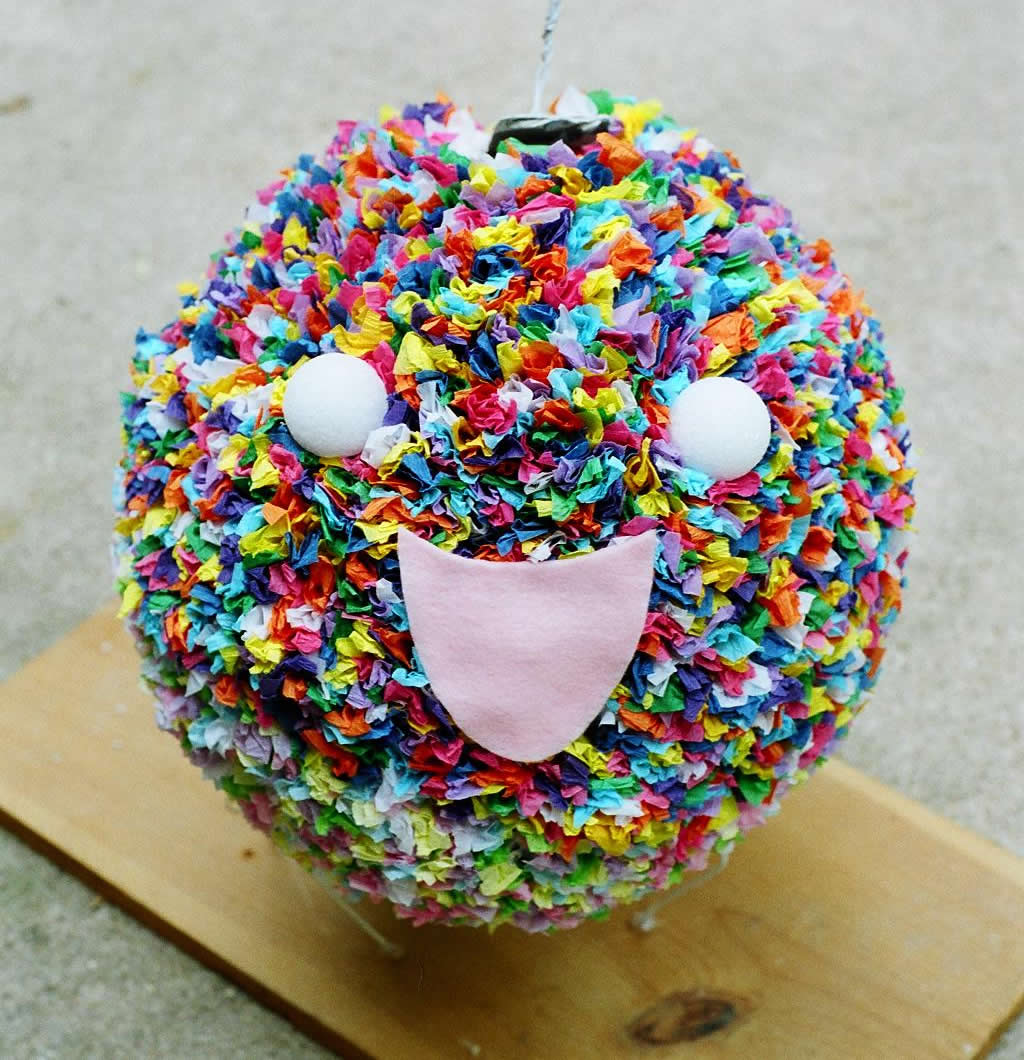
The shape of the fins evolved slightly each time, but they remained orange because I never found another color that I liked better. The eyes are painted ping pong balls, the eyelashes are black card stock, and the mouth is pink felt.
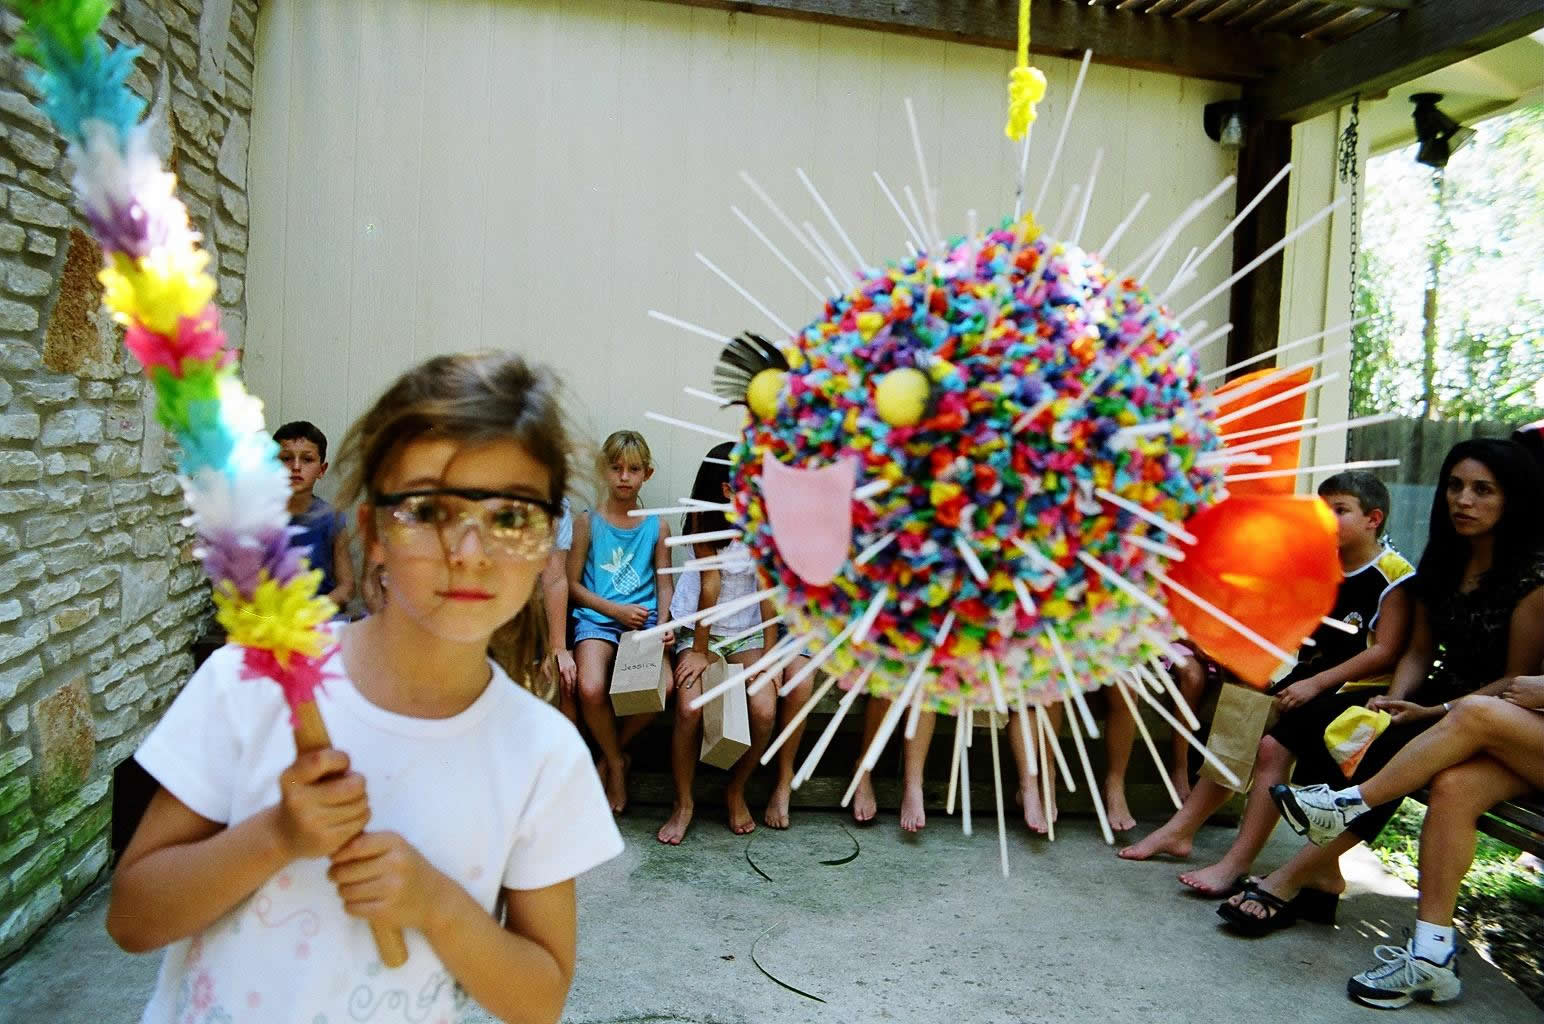
My wife insisted on the safety glasses, but the lightweight balsa wood sticks didn’t fly very far.
The floral technique creates a one-inch-thick soft cushion of crepe paper that protects the piñata and makes it harder for kids to break, so I weakened the walls of the piñata before decorating it by stabbing it all over with a knife.
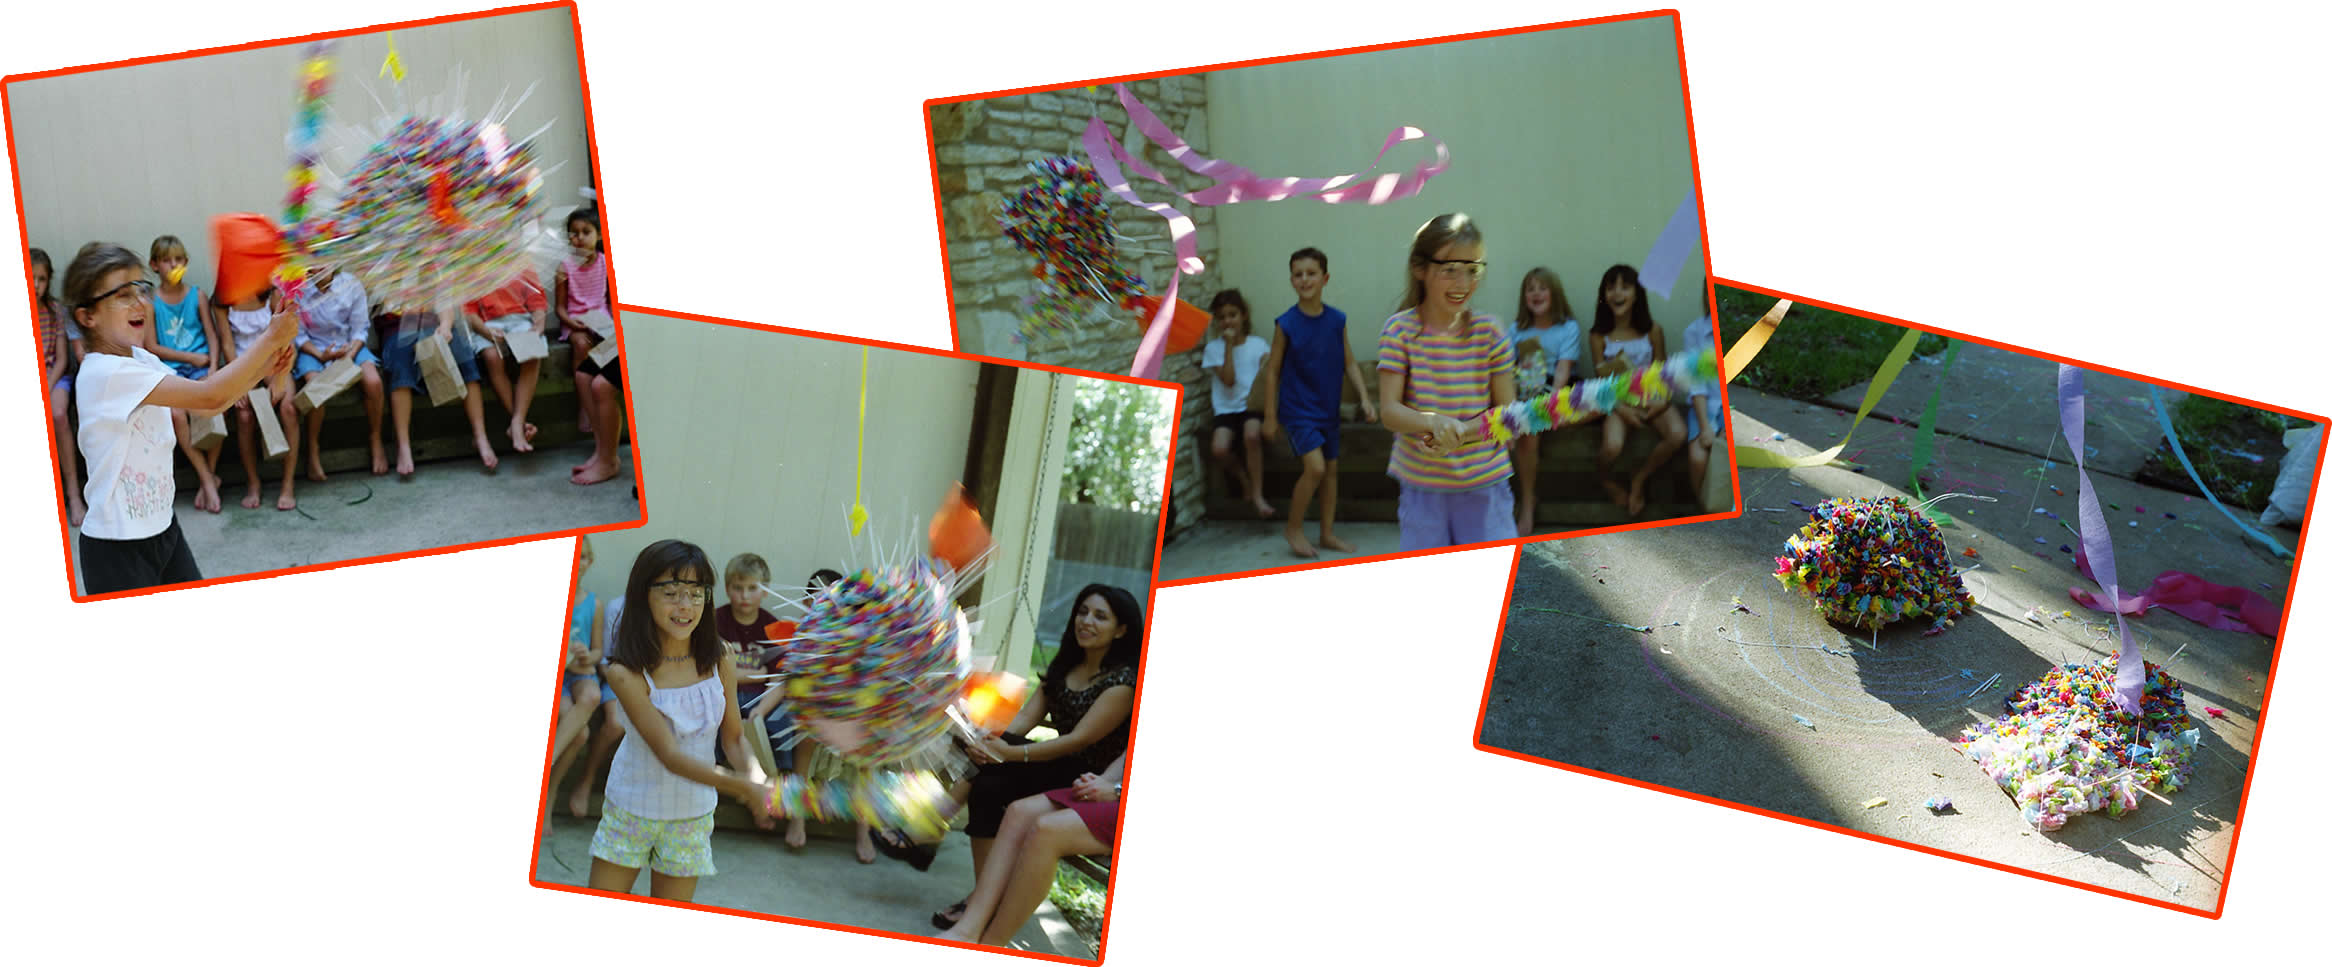
Weakening the walls helped the piñata break well even though most of the initial hits only seemed to dent the outer cushion.

This isn’t the only way to make a porcupine pufferfish piñata, but it’s probably the hardest. How about a nice Tropical Fish piñata instead?