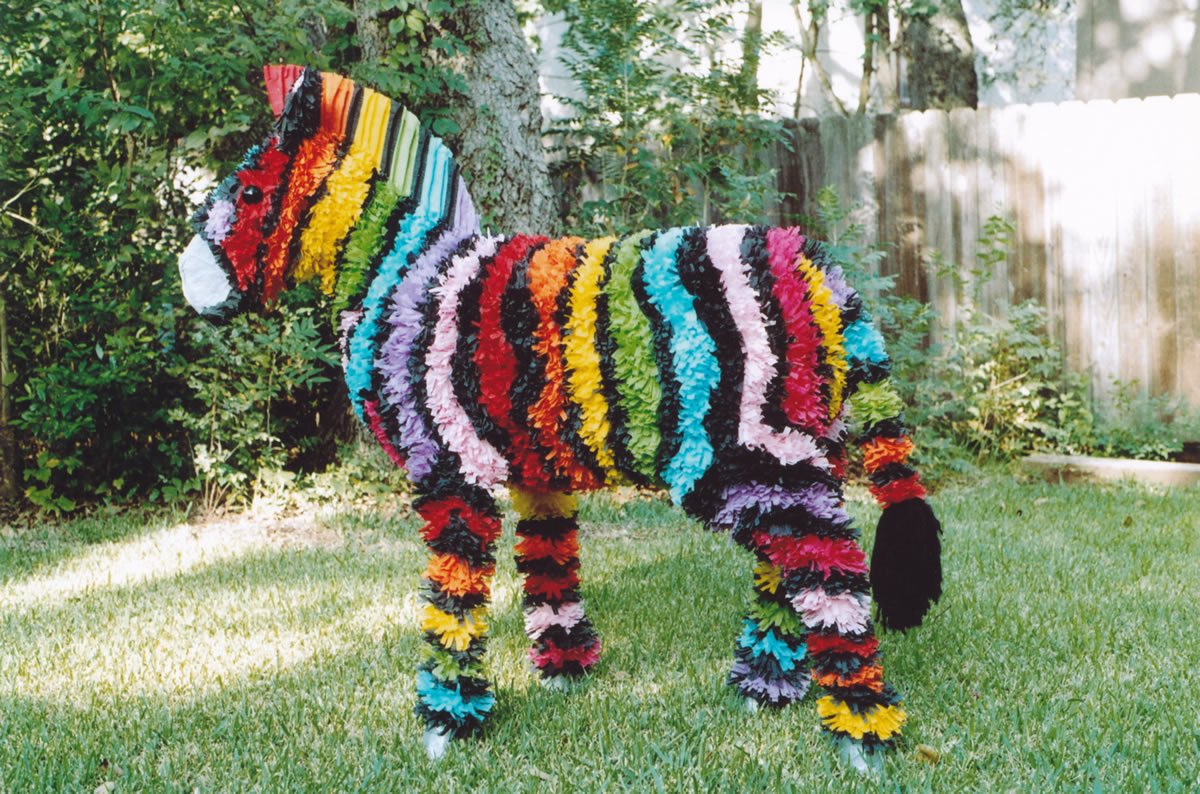
It looks like an ambitious project, but the Rainbow Zebra piñata is actually made up of a lot of fairly simple steps. You can make any number of large animal piñatas (such as the Jaguar) by following a similar procedure. This is how I made my first Rainbow Zebra.
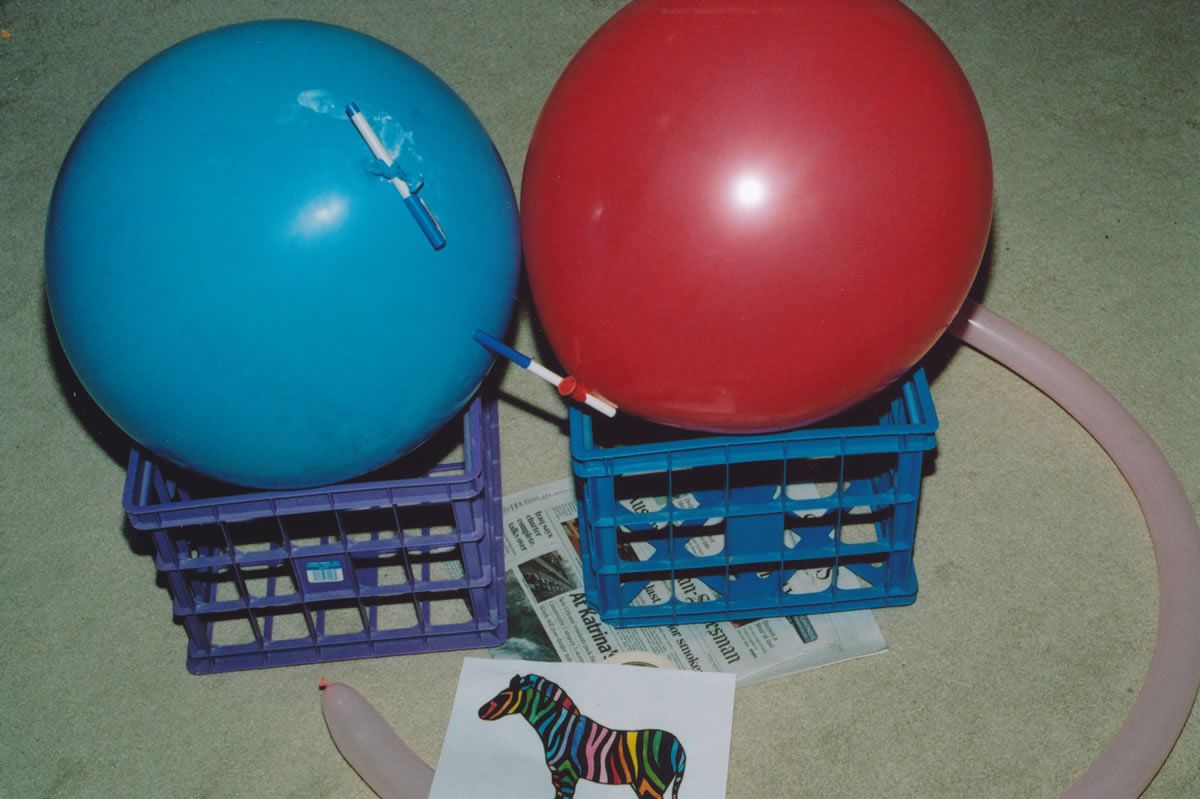
I started with a clip art image of a zebra. These punch balls will form the zebra’s shoulders and haunch. The punch balls are tied around those markers because I’m so cheap I tried to reuse the punch balls. I thought that if I tied the punch balls around markers, then when the papier mâché was dry I would be able to remove the markers, untie the punch balls, and remove them without popping them. It didn’t work. The punch balls leaked air overnight, the papier mâché collapsed, and I ended up having to start over.
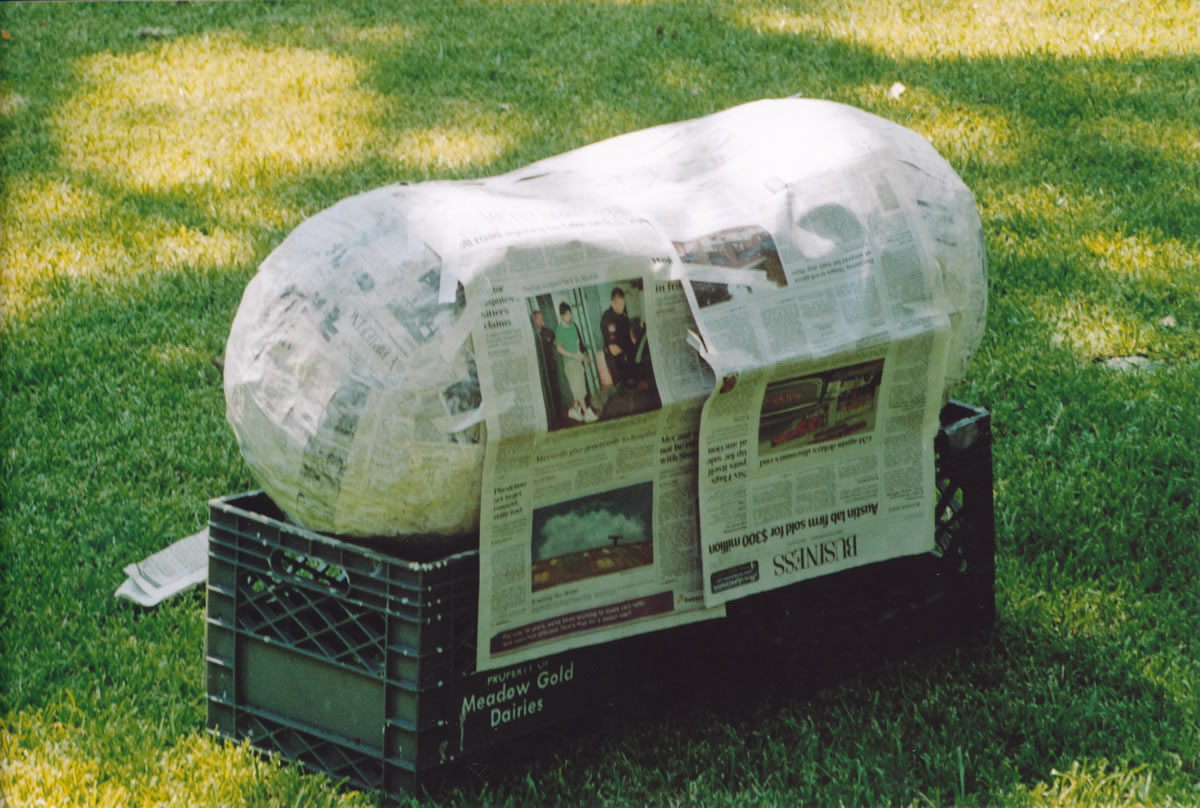
The punch balls were wrapped in newspaper, then covered with 3-4 layers of papier mâché. Then I taped on a newspaper bridge to connect them and layered papier mâché onto that. The body will have three candy compartments – the shoulder, the haunch, and the section in between. This is the same way I made the body of the Jaguar [Jaguar] piñata a few years later. The walls are getting pretty thick already, but I’ll fix that later.
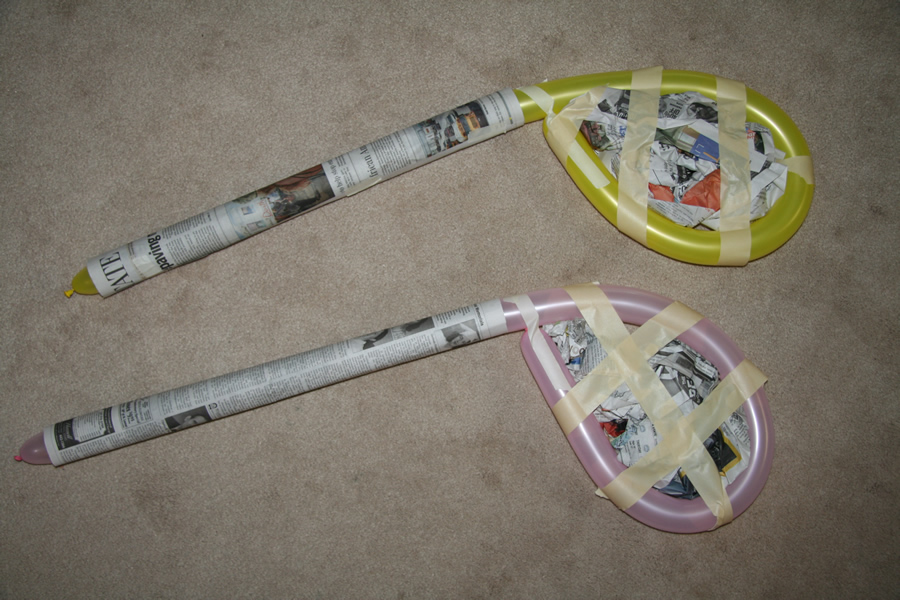
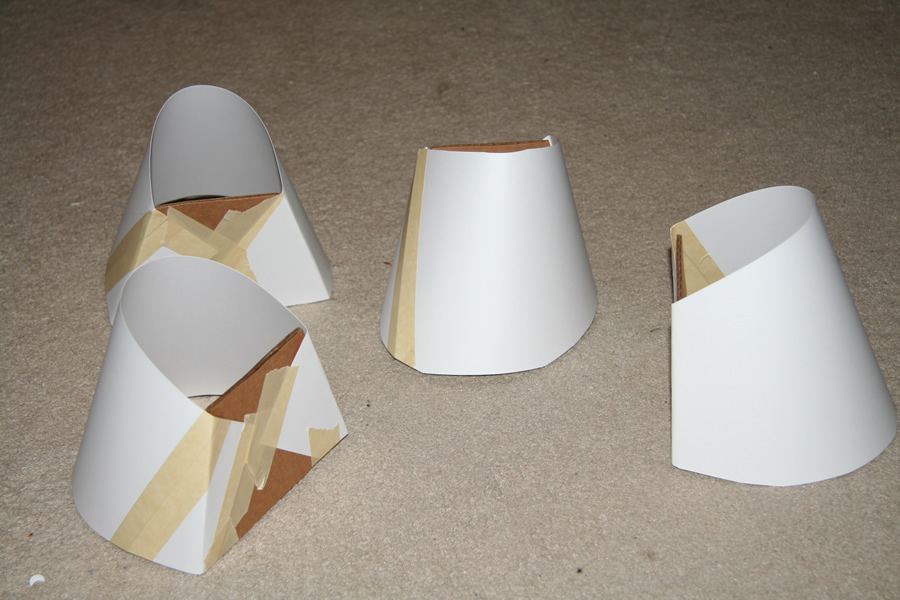
The legs were made from long skinny balloons. The bulges at the hips and shoulder were made by simply bending the long balloon back around in a loop like this. This photo is actually from a Warlords of Nibblecheese piñata, but the zebra’s legs were made the same way.

The legs gave me all kinds of problems. They kept sagging outward to the sides while drying, and the angled joint in the back leg turned out to be a major structural weakness in the piñata. Twice when the legs were dry and I stood it up, the back legs collapsed at that joint and had to be rebuilt. I solved the sagging problem by bracing the legs together using masking tape and cardboard boxes. If you look closely you can see the masking tape in the picture – the tape held the legs together and the boxes held them apart, so they couldn’t move in either direction. I reinforced the angled joint in the back legs using cardboard tubes from wrapping paper rolls.
I made the legs too long on purpose because I was afraid of making them too short. I will cut them to their proper lengths later.
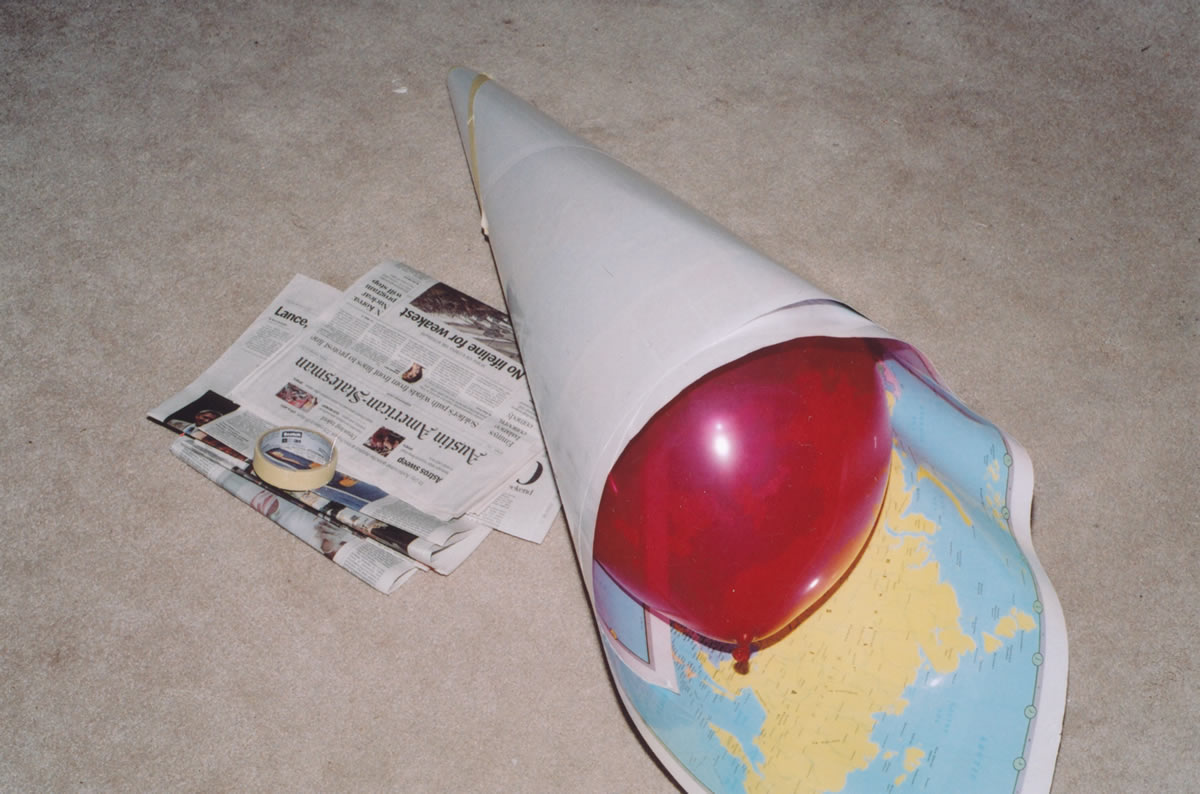
To make the zebra’s neck I wrapped a laminated world map in a cone shape around a balloon, then taped sheets of newspaper over the map and covered the newspaper with papier mâché. A zebra’s neck isn’t a circular cone, so when the papier mâché was dry I squashed it a little into more of an oval-shaped cone.
The zebra’s head was made from a balloon and a thin cardboard box to shape the snout. After I papier mâchéd it, the snout seemed a little too short, so I stuck another box on the end to lengthen it a little, and papier mâchéd over that. Piñata-making is full of little tweaks and adjustments like that, but the decorating hides it all.
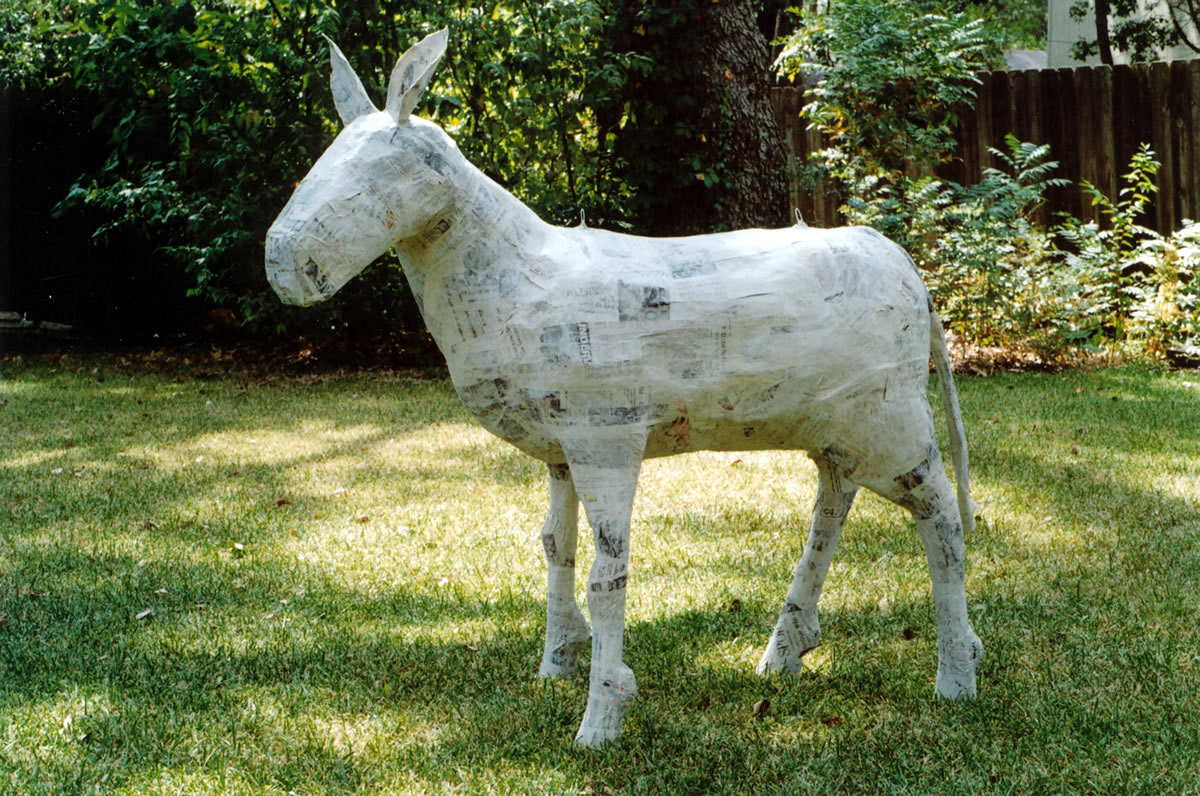
All the pieces are assembled!
I made a tail from rolled up newspaper and covered it with papier mâché. The ears are card stock covered in papier mâché. I have cut the legs to their proper lengths and added bumps at the knees and ankles. The hooves were made from disposable drinking cups covered in papier mâché and then spray painted.
This papier mâché zebra sculpture looks a lot slimmer than the final piñata because the fluffed crepe paper will add thickness in every dimension. In hindsight, I should have made the hooves a couple inches wider so they would stand out better after the legs are fluffed.
The second Rainbow Zebra piñata had much wider hooves made from card stock and cardboard.
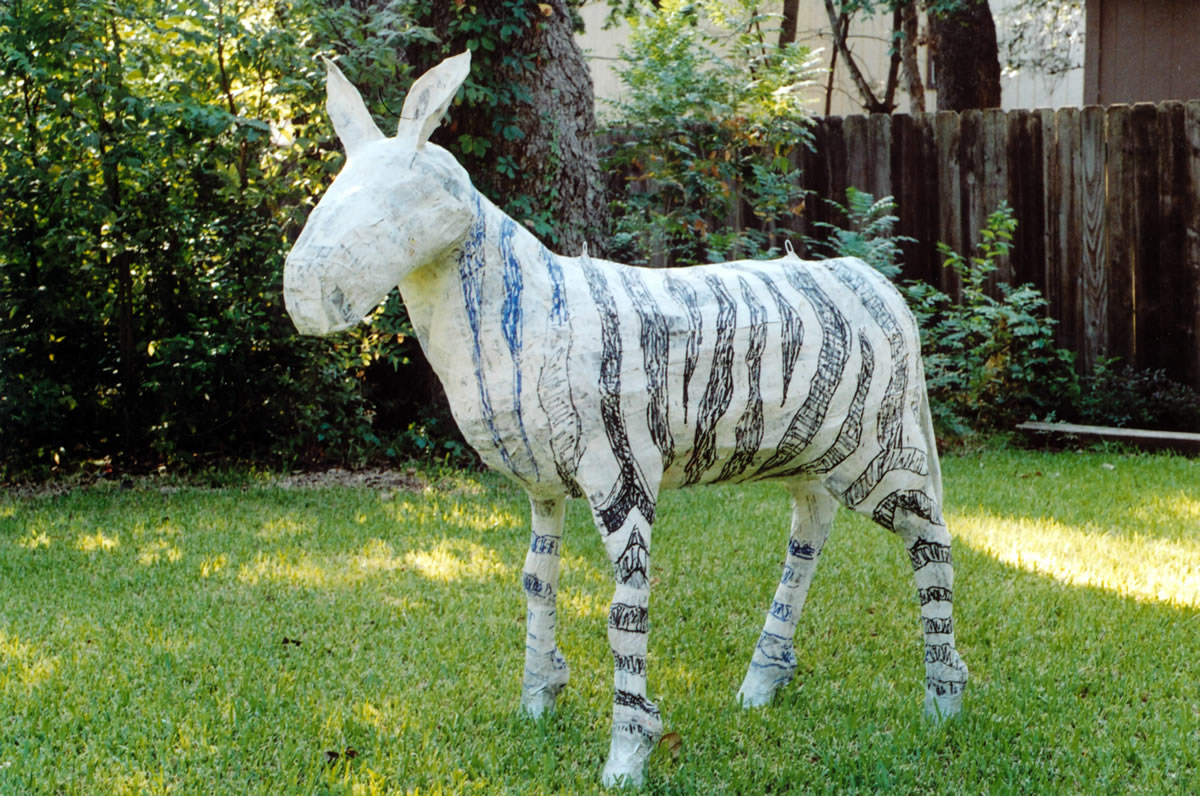
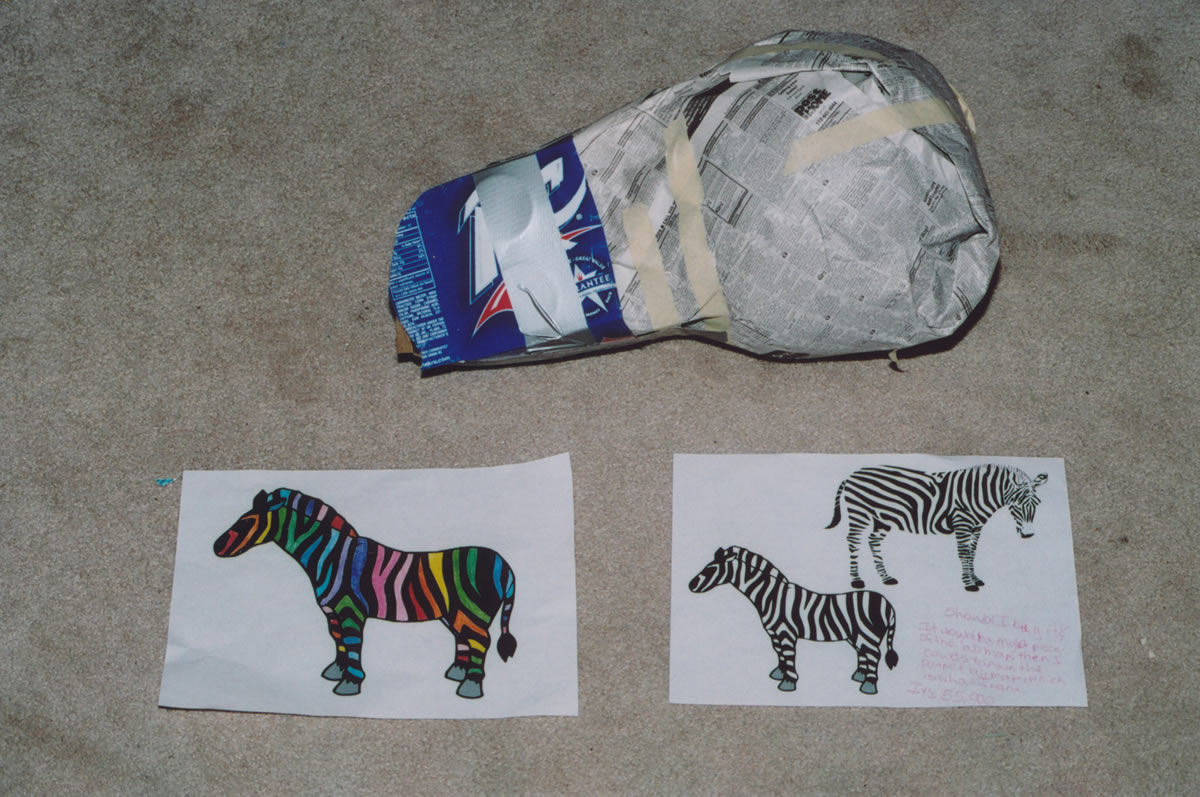
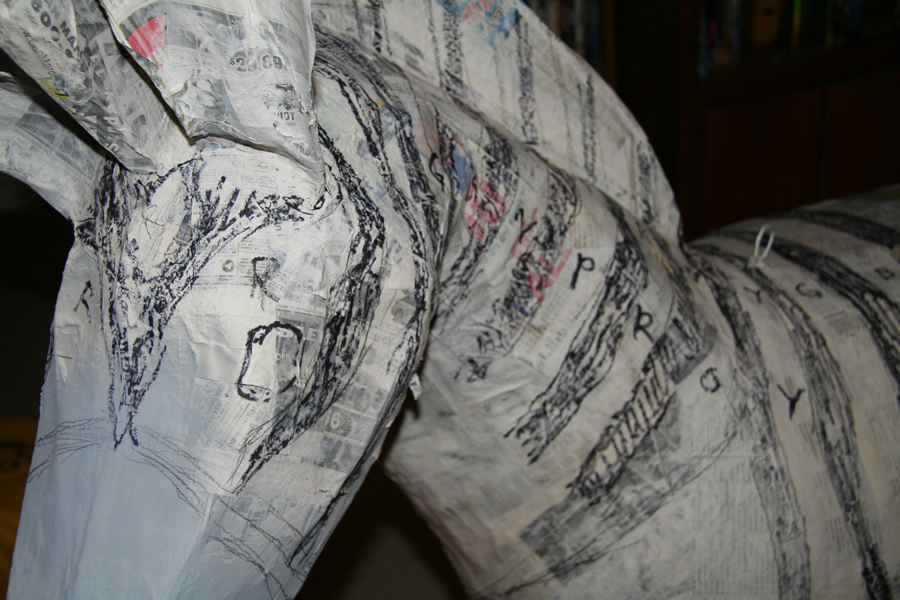
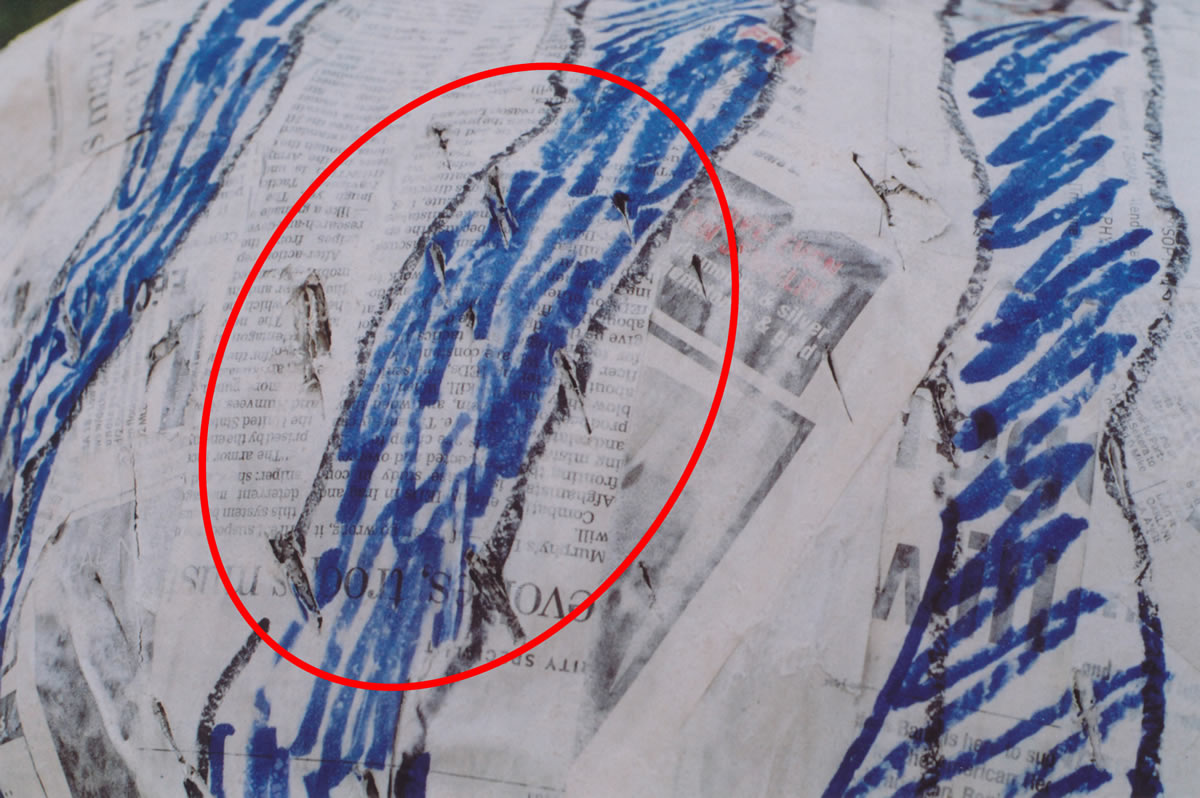
Before decorating the zebra, I drew stripes to use as a guide. Once I started decorating, however, I realized that conventional zebra stripes won’t work on a Rainbow Zebra. I wanted each bright color to be separated by black, but the stripes I had drawn would result in different colors meeting. So I ended up having to revise the stripes as I was doing the decorating with crepe paper. (Some of the stripes are black and some are blue because my black marker ran dry.)
Here’s a rare photo of my second Rainbow Zebra piñata in progress. This time I drew the stripes correctly and marked which rainbow colors to use where.
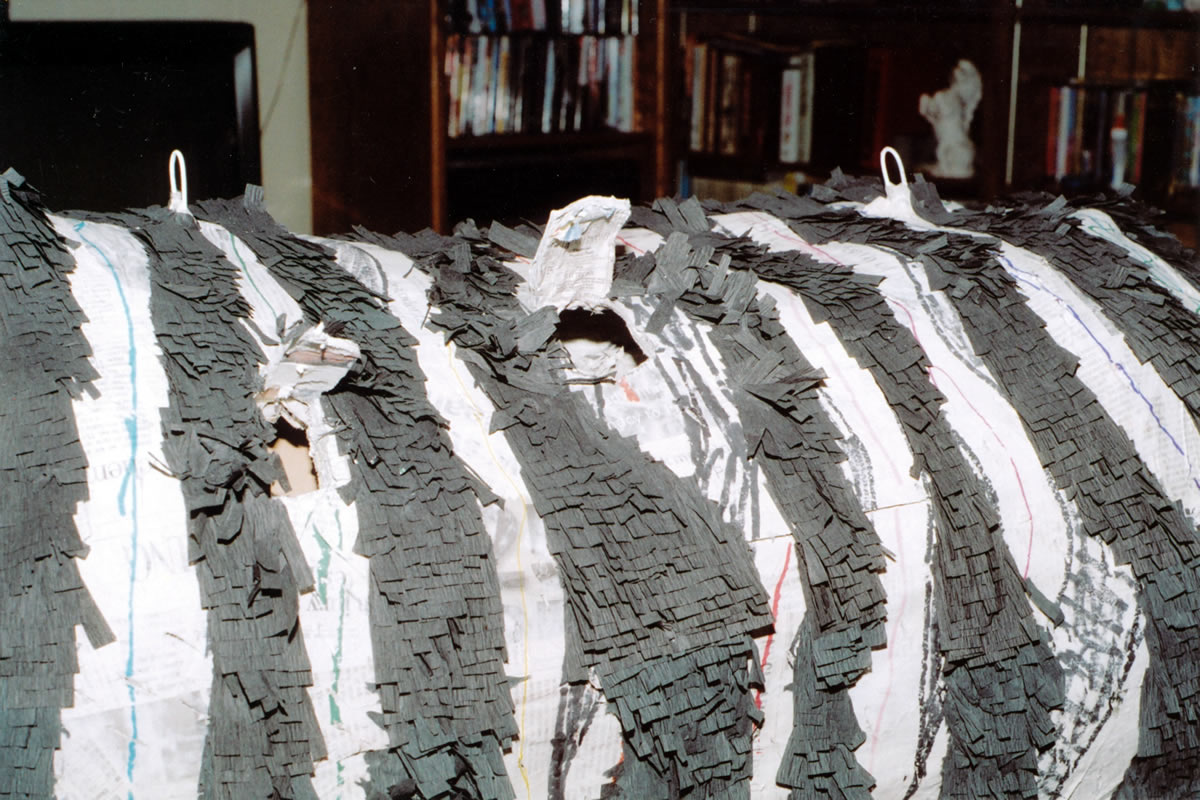
On a piñata this large, the walls of the piñata have to be pretty thick just to support their own weight, but that makes the piñata too thick for the kids to break. So before decorating, I created weak spots in the zebra by stabbing it repeatedly with a knife. This picture shows about 20 punctures, but after taking this photo I added about that many more. I weakened all the target areas this way.

When decorating with crepe paper I always start at the bottom of the piñata so that each new layer of crepe paper overlaps the one below it. After I covered the legs I turned the piñata upside down to make it easier to work on the belly. I worked my way up his sides to his back, his neck, and then finished with his head.
Now that his legs are decorated, you can see how adding the crepe paper thickened his legs and made his hooves look too small. The hooves on the second Rainbow Zebra were much larger than these.
Normally I wait until the piñata is decorated before cutting the hole for filling the piñata, but I was worried about the walls being too thick, so I went ahead and cut the doors now so that I could still fix or hide any mistakes I might make. This picture shows the open door flaps leading into to the shoulder and back compartments. The haunch also has a flap for adding candy, but it’s on the other side of the piñata. Once the zebra is decorated, the fluffed crepe paper will hide these doors completely.
I added the hanging hooks to the two biggest candy compartments before decorating began. You can also see them in the two outdoor photos earlier on this page. The hooks were made from wire shirt hangers and cardboard as explained on the Hanging Hook page.

The zebra’s mane was made of three strips of cardboard with some additional cardboard pieces wedged into the top of the mane to give the mane a wider bristle at the top than at the base.

If you’re wondering why I waited so long before adding the mane, it’s because I completely forgot about the mane until I was already this far along in the decorating. Then I had to figure out how to put one on. I cut a slit down the neck, wedged some cardboard in, and hot glued it in place. It worked out well in the end, but when I made the second Rainbow Zebra piñata, I remembered to add the mane during the papier mâché stage.
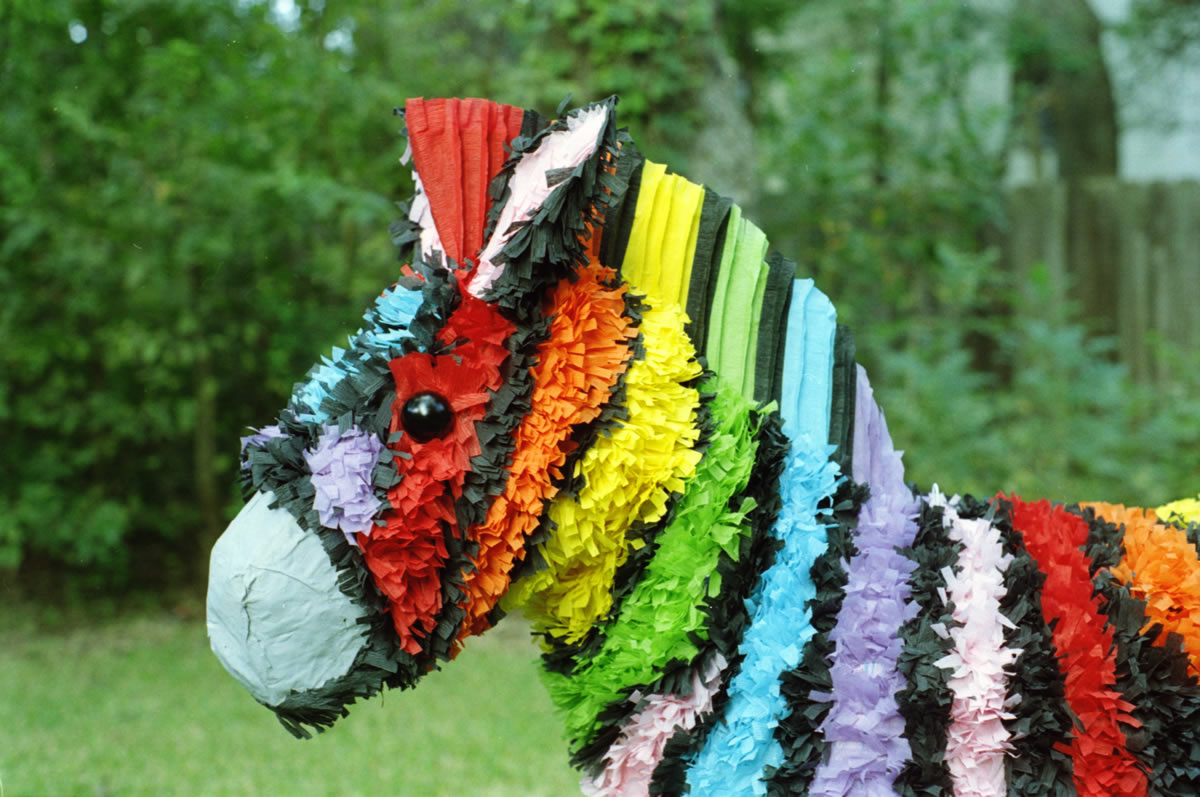
I painted the nose gray instead of black because I thought that too much black in one place would look too heavy. The hooves were painted silver instead of black because it’s a Rainbow Zebra, and everybody knows that Rainbow Zebras have silver hooves. (The second Rainbow Zebra piñata had a silver nose instead of gray.)
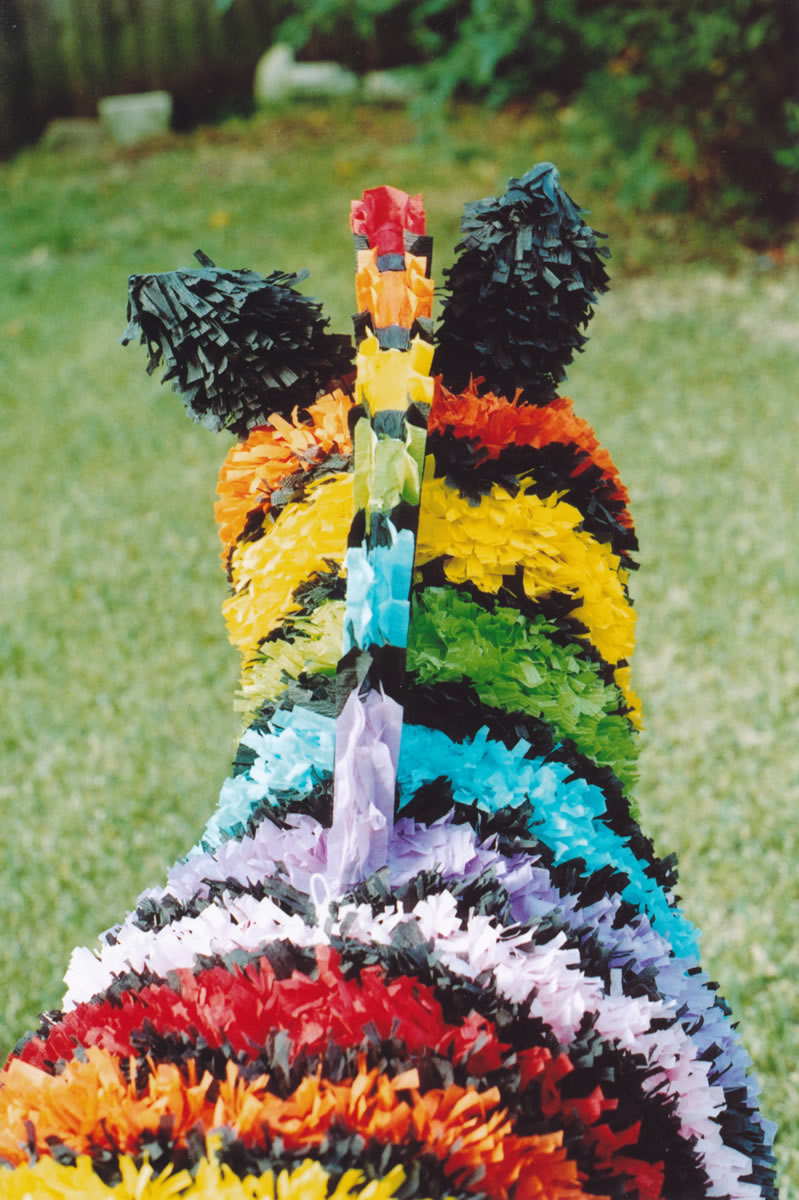
The mane was decorated by folding crepe paper to give it some three-dimensionality and then taping it onto the cardboard mane using double-stick Scotch tape.
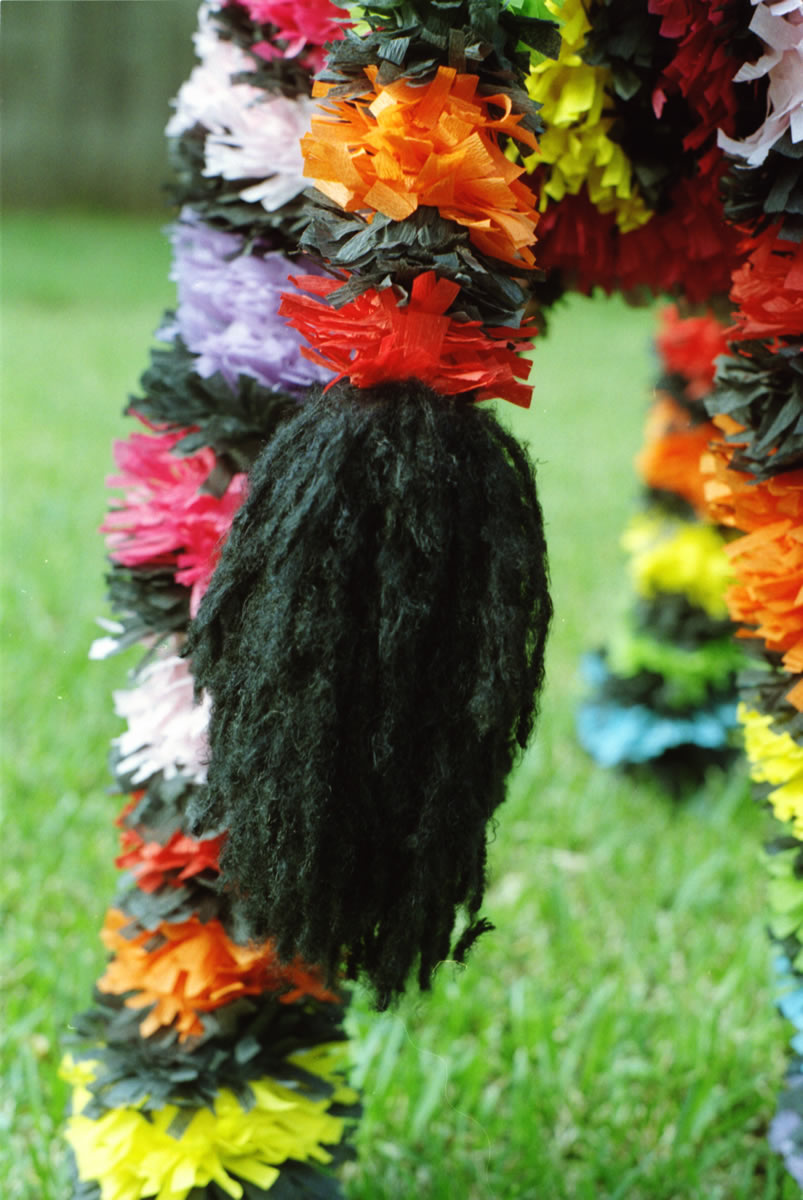
The tail tassel was black yarn tied into eleven small bundles which were then attached to the tail, probably with hot glue. It’s been so long I don’t remember how I did it, but that’s probably the way I would do it today. I think I made the tassel too thick, though, so when I made the next one I backed off a little with the yarn.
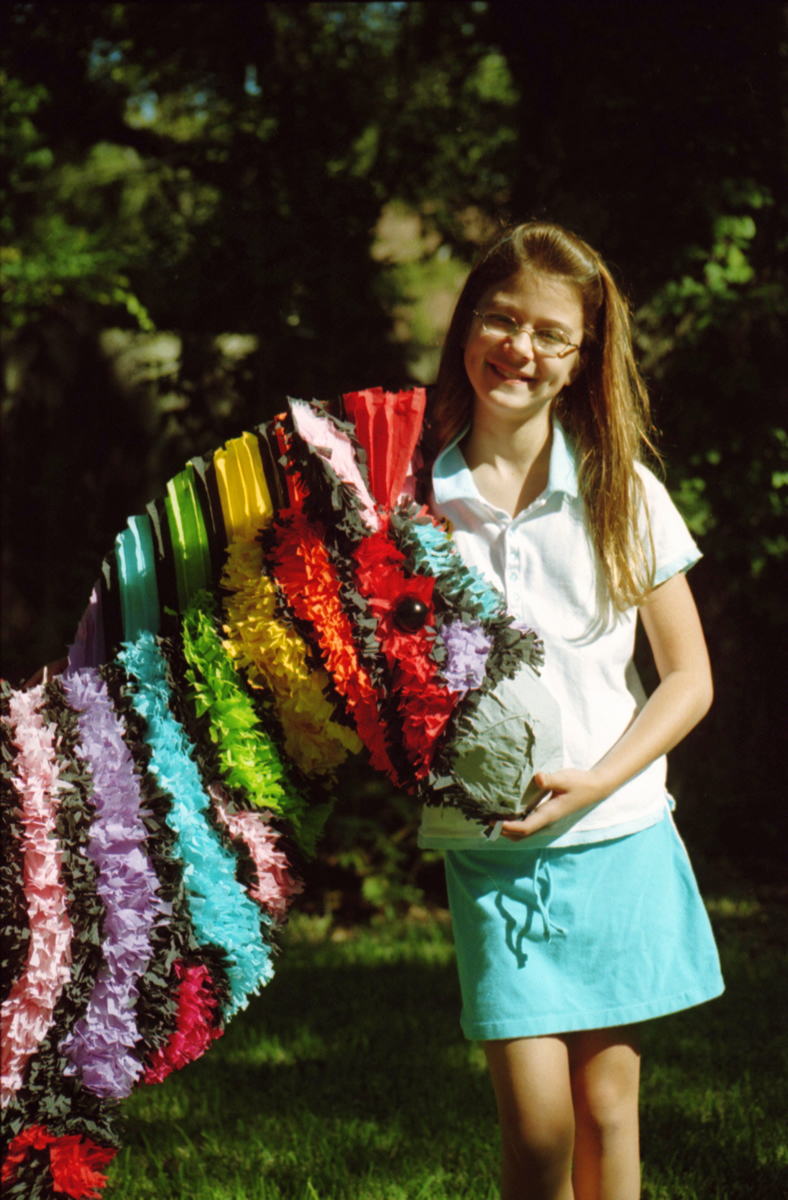
That’s all there is to it! The Rainbow Zebra piñata took a long time because I had to keep feeling my way through the project, and some of the problems (such as the legs sagging and buckling) had me scratching my head for a while.
A couple years later when I made another Rainbow Zebra piñata, I used what I learned on this one to make the second one better. I didn’t take many pictures while building the second one, but if you want to see what I did differently, check out the Rainbow Zebra page.
